Lead Time Master
Lead Time Master - User Guide
1. Introduction 📝
The Lead Time Master is a strategic procurement tool used to define the expected duration for receiving goods from specific vendors. By mapping items to their respective suppliers and branches, the system can accurately predict when a purchase request (Indent) will be fulfilled based on historical or agreed-upon timelines.
Why use Lead Time Master?
- Automated Scheduling: Automatically calculates “Required By” dates for procurement.
- Vendor Accountability: Sets a benchmark for delivery performance.
- Logistics Planning: Accounts for different shipping methods (Road, Air, Sea) through transit day adjustments.
2. Getting Started 🚀
Accessing the Module
Navigate to Supply Chain Setup > Lead Time Master.
The Index Page
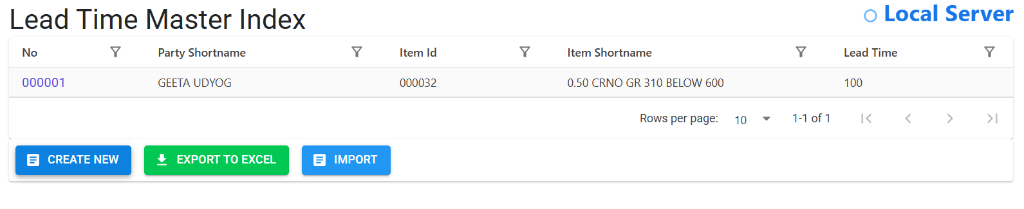
The Index Page displays all existing lead time configurations. It provides a quick search for specific party or item combinations and allows for bulk operations like Excel exports and imports.
Lead Time Details
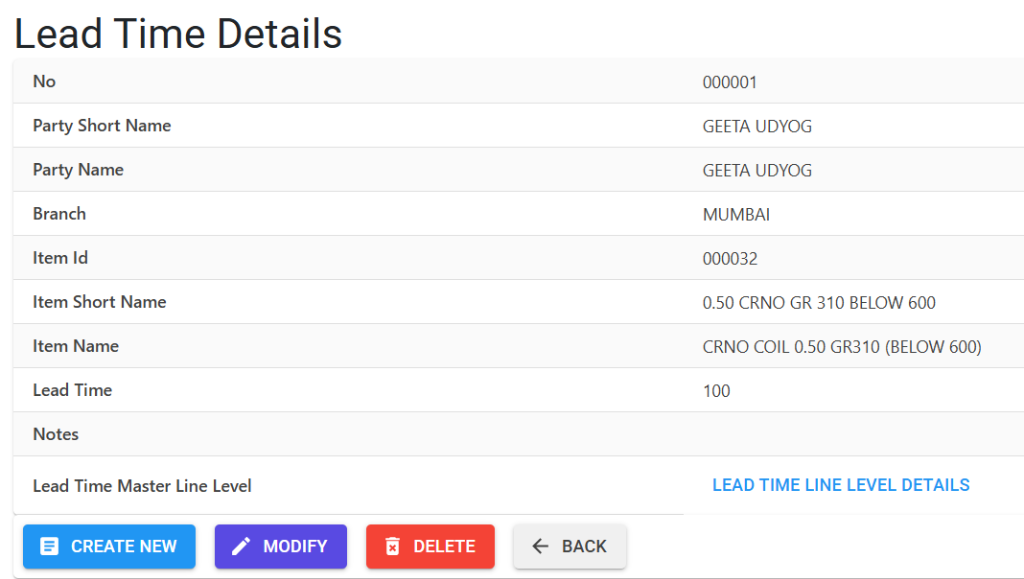
Clicking on a record identifier opens the Details Screen. This view allows you to manage the specific procurement timelines:
- Header Mapping: View the link between the Vendor, Branch, and Item.
- Management Actions: Use buttons to Modify, Delete, or Create New entries.
- Line Level Details: Access specific Transit Days assigned to various transport modes.
3. Key Features ✨
⏳ Base Lead Time
The “Lead Time” field in the header represents the standard processing time required by the vendor to prepare the goods for dispatch.
🚚 Transport-Specific Transit Days
Different shipping methods take different amounts of time. The master allows you to define unique transit days for:
- Road: e.g., 5 days.
- Air: e.g., 1 day.
- Sea: e.g., 20 days.
📥 Bulk Import (Excel)
For businesses managing thousands of items, the system supports a robust Excel Import feature. It includes a smart validation engine that checks for:
- Invalid Party or Item IDs.
- Duplicate transport modes.
- Lead times exceeding the 180-day limit.
4. Usage Across Modules & Transactions 🔄
🛒 Indent Management (The “Magic” Calculation)
The most critical use of this master is during Indent Creation. When you select a Vendor and an Item, the system performs a real-time calculation:
Required By Date = Indent Date + Base Lead Time + Transit Days
5. Related Reports 📊
📉 Lead Time Master Register (XL)
A comprehensive export of all vendor-item lead times, including transport modes and notes. This is typically used by the Procurement Manager to review and negotiate better terms with suppliers.
📊 Indent Aging Analysis
While not a part of the master itself, the Pending Indent Report uses these lead times to highlight “Critical” items—those that have exceeded their expected delivery window based on the master’s settings.
6. Guidelines and Logic ⚠️
Entry Standards
- Unique Combination: You can only have one master record for a unique combination of Party + Branch + Item.
- Limits: Both Lead Time and Transit Days must be within the range of 0 to 180 days.
- Transport Modes: Each transport mode (e.g., Road) can only be added once per master record.
7. Deletion & Modification Preventions 🛡️
🚫 Deletion Logic
- Cascading Delete: Deleting a Lead Time Master record will automatically remove all its associated transport mode sub-records (Transit Days).
- Traceability: Master records can be deleted if they are no longer needed, allowing for cleanup of inactive vendor-item relationships.
✏️ Modification Rules
- Fixed IDs: Once created, the Party, Branch, and Item relationship is fixed. If you need to change these, a new record must be created.
- Note Length: Any additional context or remarks are limited to 200 characters to keep records concise.
8. Best Practices / Tips 💡
- Synchronize with Contracts: Ensure the Lead Time in the ERP matches your legally binding supply contracts with vendors.
- Account for Seasonal Delays: If a specific transport route is prone to delays during certain seasons, consider updating the Transit Days temporarily to maintain realistic scheduling.
- Use Excel for Mass Updates: When vendor lead times change across an entire product category, use the “Export to XL” tool, update the values, and “Import” back to save time.