Contact Master
Contact Master - User Guide
1. Introduction 📝
The Contact Master is used to store and manage the details of key personnel associated with your Parties (Customers and Suppliers). It ensures that different departments in your organization (Sales, Accounts, Logistics) know exactly whom to contact for specific business activities like order follow-ups, payment reminders, or statutory documentation.
Key Objectives of Contact Master:
- Touchpoint Management: Categorize contacts by their business role (e.g., Finance head vs. Procurement manager).
- Communication Hub: Centralize mobile numbers and multiple email addresses for automated or manual communication.
- Branch Specificity: Link contacts to specific party locations (branches).
2. Getting Started with Contact Master 🚀
Accessing the Module
To access the Contact Master module, navigate to the Common Masters > Contact section from the main menu.
The Index Page
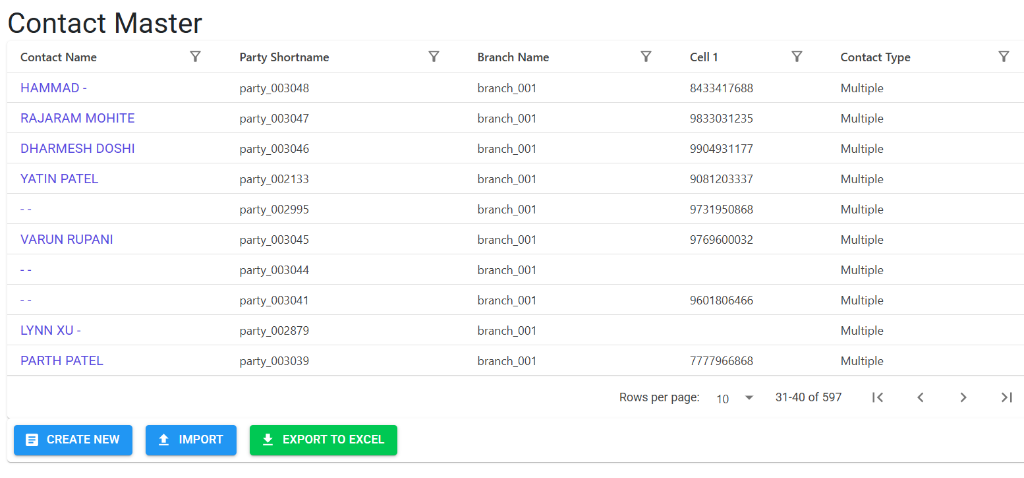
Upon opening, the Index Page displays a comprehensive list of all personnel associated with your business partners. Here, you can:
- Search/Filter: Look for specific personnel by Contact Name, Party, or Branch.
- Quick Navigation: Click on a Contact Name to edit or view their specific details.
- Action Buttons: Buttons for Create New, Import, and Export to Excel are available for managing the database.
Contact Master Details
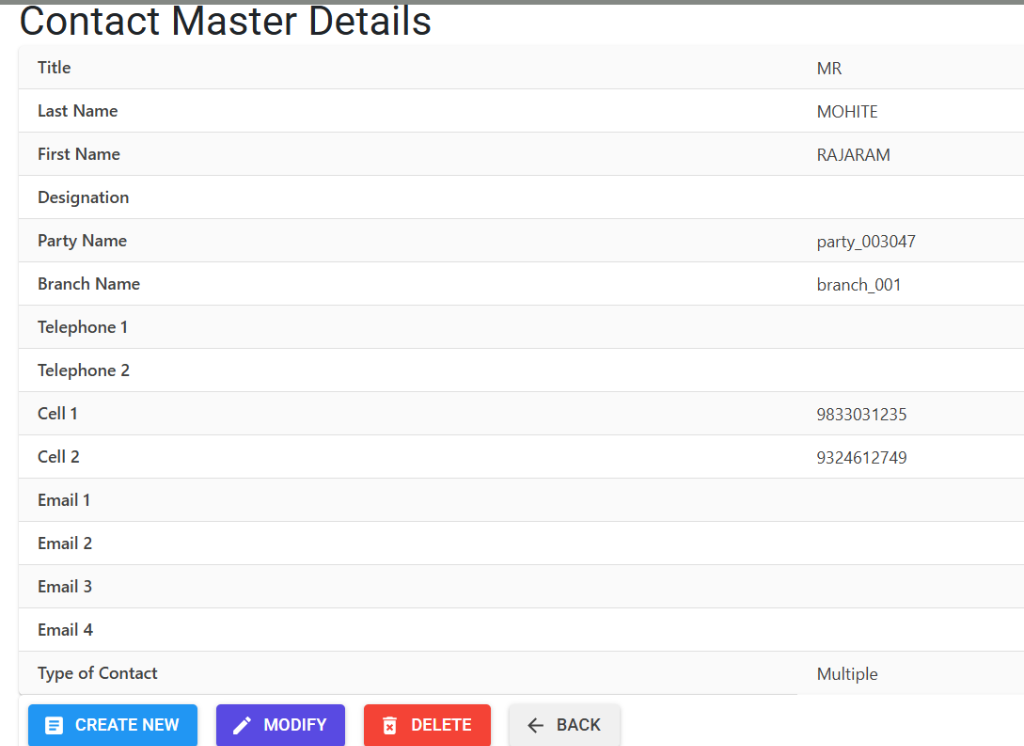
Selecting a contact opens the Details View, which captures essential communication and role data:
- Employee Identity: Capture the person’s Title, Name, and Corporate Designation.
- Business Mapping: Link the individual to a specific Party and Branch.
- Communication Matrix: Multiple fields for Cell numbers, Telephones, and Emails to ensure you always have a touchpoint.
- Role Assignment: Define the “Type of Contact” to control how the system interacts with this person for automated alerts.
3. Structural Breakdown 🏗️
Each contact record is defined by its relationship to a Party and a specific role:
- Party & Branch Link: Every contact must be linked to a valid Party ID and a specific Branch ID.
- Identity Details: Title (Mr./Mrs./Ms./Dr.), First Name, Last Name, and Designation.
- Communication Channels:
- Primary and Secondary Cell numbers (10 digits).
- Primary and Secondary Telephone/Landline numbers.
- Up to Four Email Addresses to ensure redundancy and group communication.
- Contact Type: A critical classification used by the system to filter recipients for different modules (see below).
4. Contact Type & Business Roles 🏷️
The Contact Type determines how the system uses the contact information during automated processes:
5. Business Validations & Rules 🛡️
To maintain high data quality for communication, the system enforces:
| Feature | Validation Rule |
|---|---|
| Mandatory Communication | At least ONE of the following must be filled: Telephone 1, Cell No 1, or Email 1. You cannot save a “silent” contact. |
| The “Multiple” Rule | If a branch has a contact marked as type “M” (Multiple), the system prevents adding other specific types (like Orders or Indents) to that branch, as “Multiple” covers everything. |
| Unique Roles | You cannot have two “Orders” contacts for the exact same Branch. Each specialized role must be unique per location. |
| Format Safety | Mobile numbers are strictly validated to 10 digits; email addresses are checked for the @ and domain format. |
6. Bulk Management 📂
The Contact Master supports massive data updates through Excel:
- Export/Model: Download existing contacts or a blank template to fill.
- Validation Audit: During import, the system runs a Two-Tier Audit:
- Format Audit (Z-Codes): Checks for text length, numeric formats, and mandatory fields.
- Logic Audit (A-F Codes): Verifies if the Party/Branch exists and ensures no role conflicts exist (e.g., multiple “Multiple” types).
7. Best Practices 💡
- Use Designations: Always fill the “Designation” field to help your sales and finance teams understand the contact’s seniority.
- Email Redundancy: Use Email 1 for the individual and Email 2/3 for a department alias (e.g.,
accounts@customer.com) to ensure messages are delivered even if a person is on leave. - Branch Linking: If a procurement manager handles three different branches, you must create a contact record for each branch to ensure they appear in branch-specific reports.