HR & Payroll Implementation Walkthrough
A quick, user-friendly walkthrough to set up and run the HR & Payroll module in ERP Crystal MFG.
📌 Phase 1: Foundation Setup (Masters)
Configure your initial masters from the Human Resources menu before running attendance or payroll.
Step 1: Set Up Core Masters
All initial masters are located under the Masters column of the Human Resources menu.
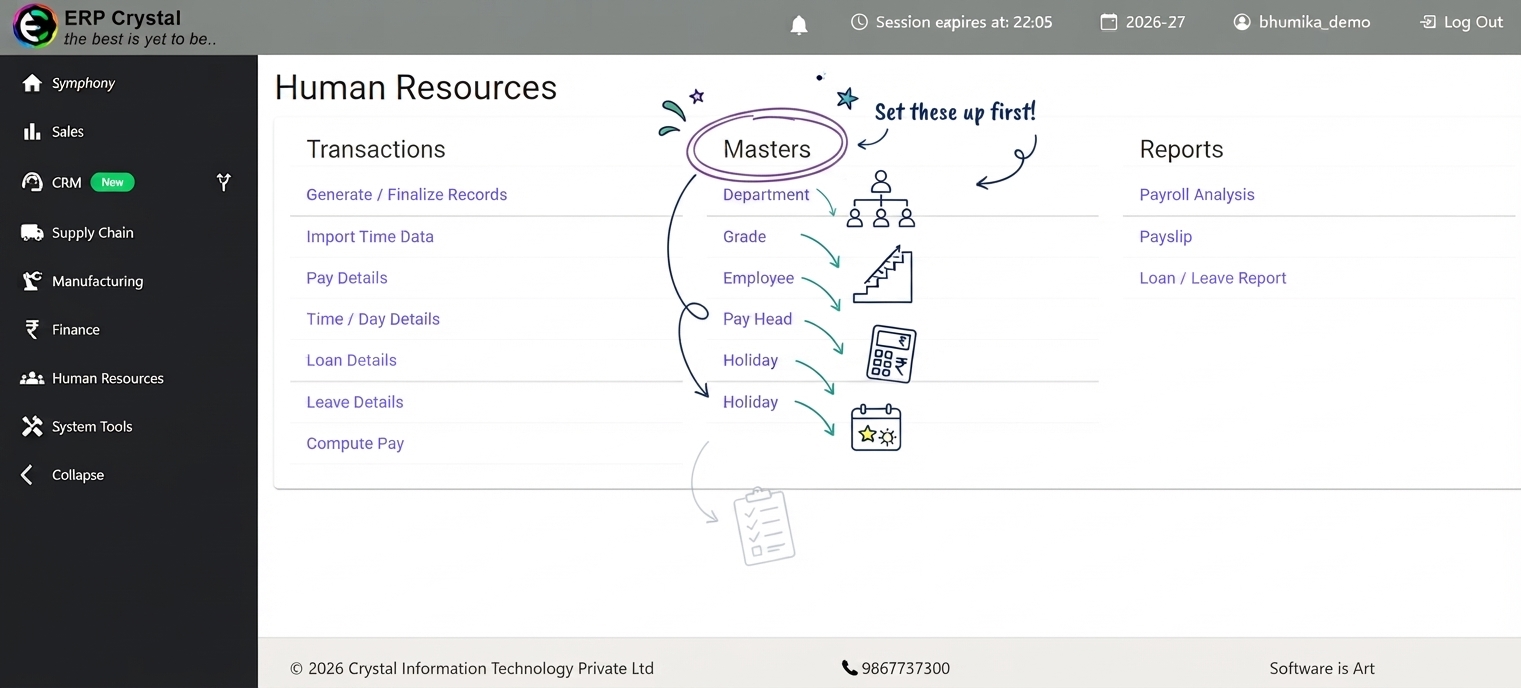
- Department & Grade: Create company departments and employee pay grades.
- Pay Head: Review standard earning and statutory deduction components (Basic, HRA, PF, ESIC, PT).
- Holiday: Define Weekly Offs (e.g., Sundays) and Paid Holidays before generating monthly payroll.
Step 2: Employee Onboarding & Bulk Import
Add employees individually or import them in bulk using the standard Excel template:
Open Employee Master: Go to Human Resources > Employee and click Import.
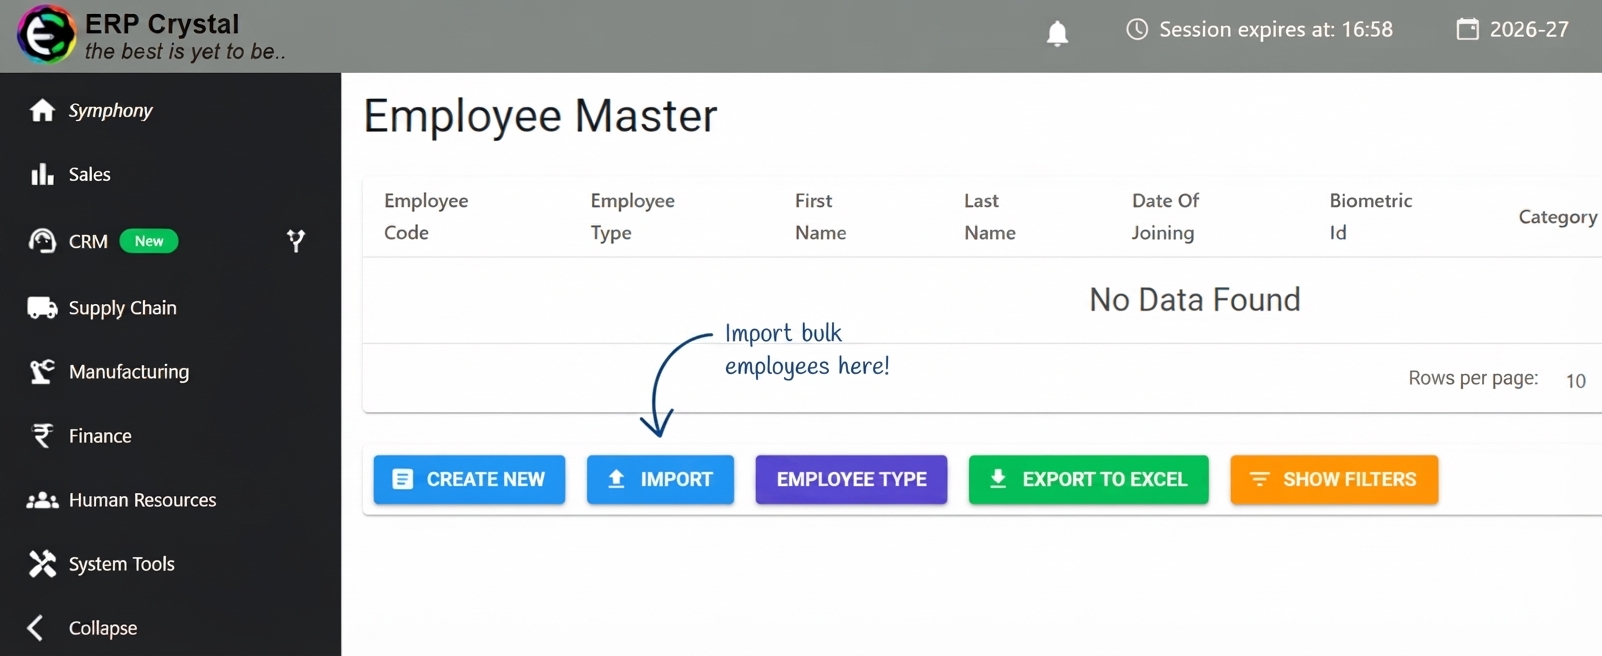
Download Model: Click Download Model to get the standard
ImportEmployeeMst.xlsxtemplate.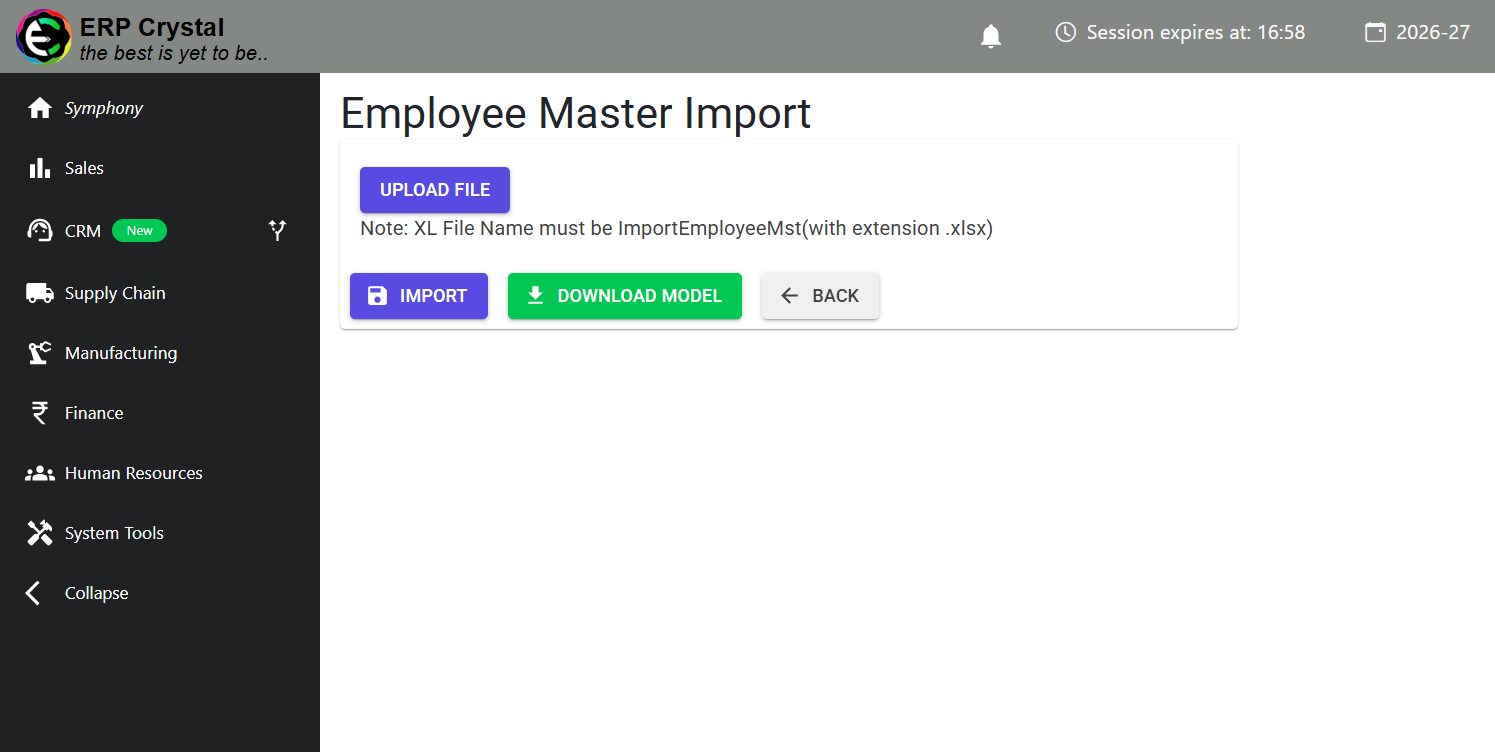
Fill Employee Data: Enter personal, job, and statutory details (review the Instructions tab first).
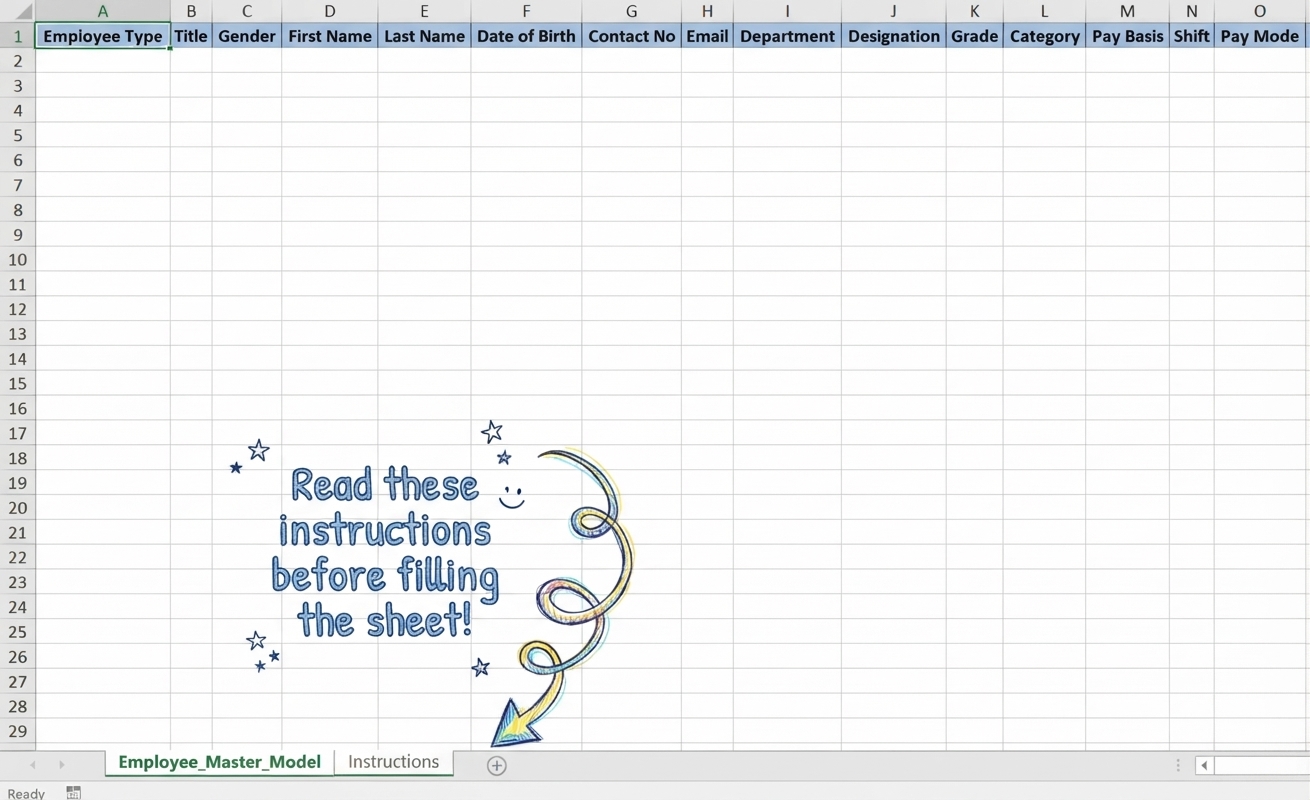
Upload & Import: Click Upload File, choose your completed
ImportEmployeeMst.xlsx, and click Import.
📌 Phase 2: Monthly Operational Routine
Run the recurring monthly payroll in 4 simple steps:
Step 1: Generate Monthly Records
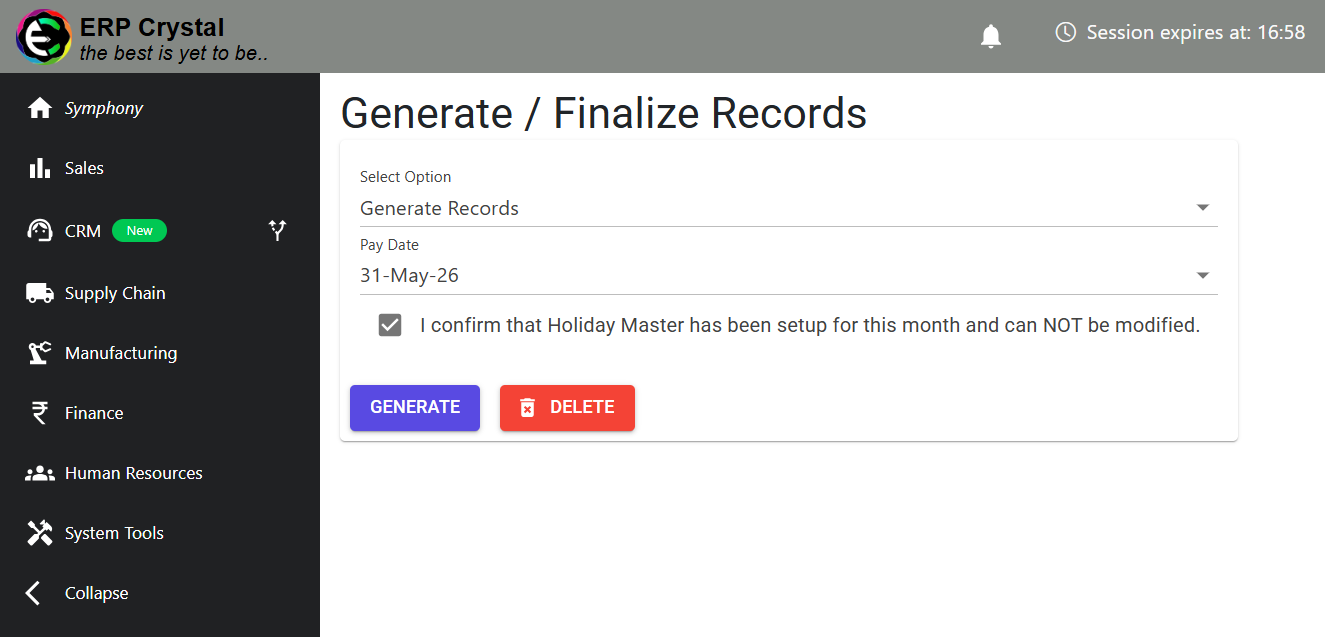
Go to Generate / Finalize Records → choose Generate Records, pick the Pay Date, check the holiday confirmation box, and click Generate.
Step 2: Capture Attendance & Time Data
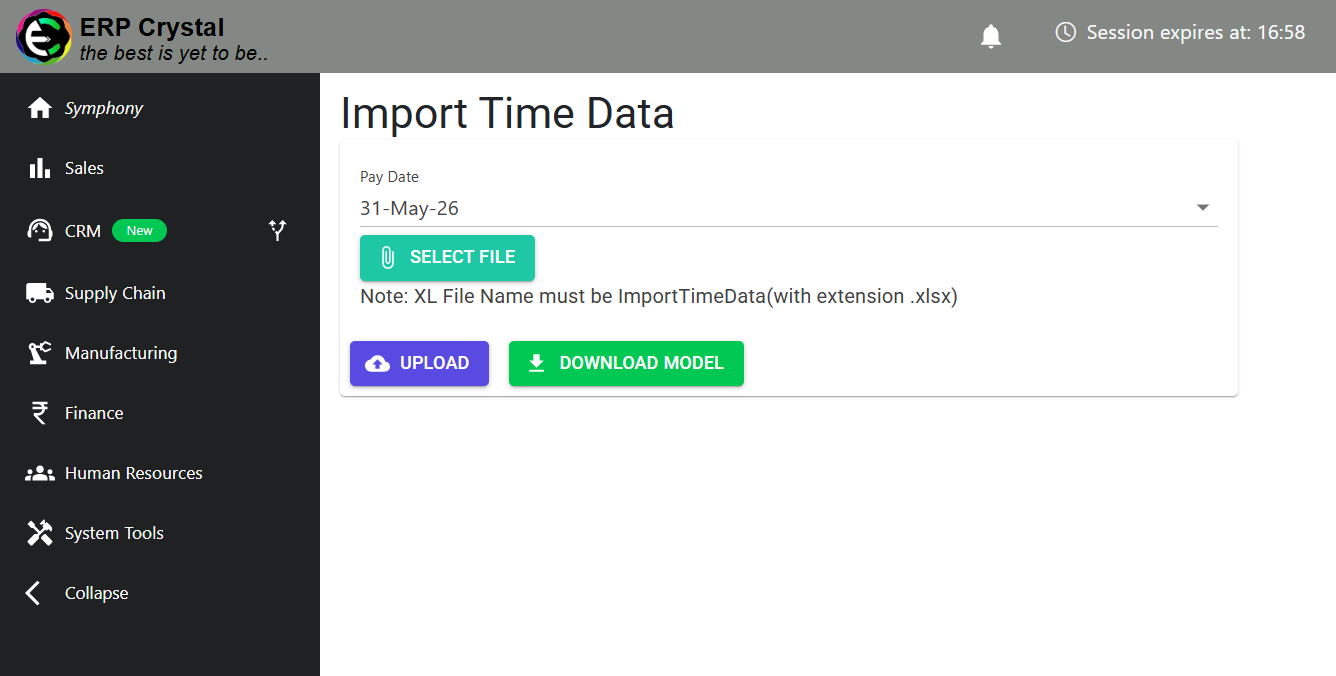
Go to Import Time Data → pick the Pay Date, click Download Model for ImportTimeData.xlsx, fill in work hours/overtime, and click Upload.
Step 3: Log Leaves & Loans
Record employee adjustments under Transactions before computing monthly salaries:
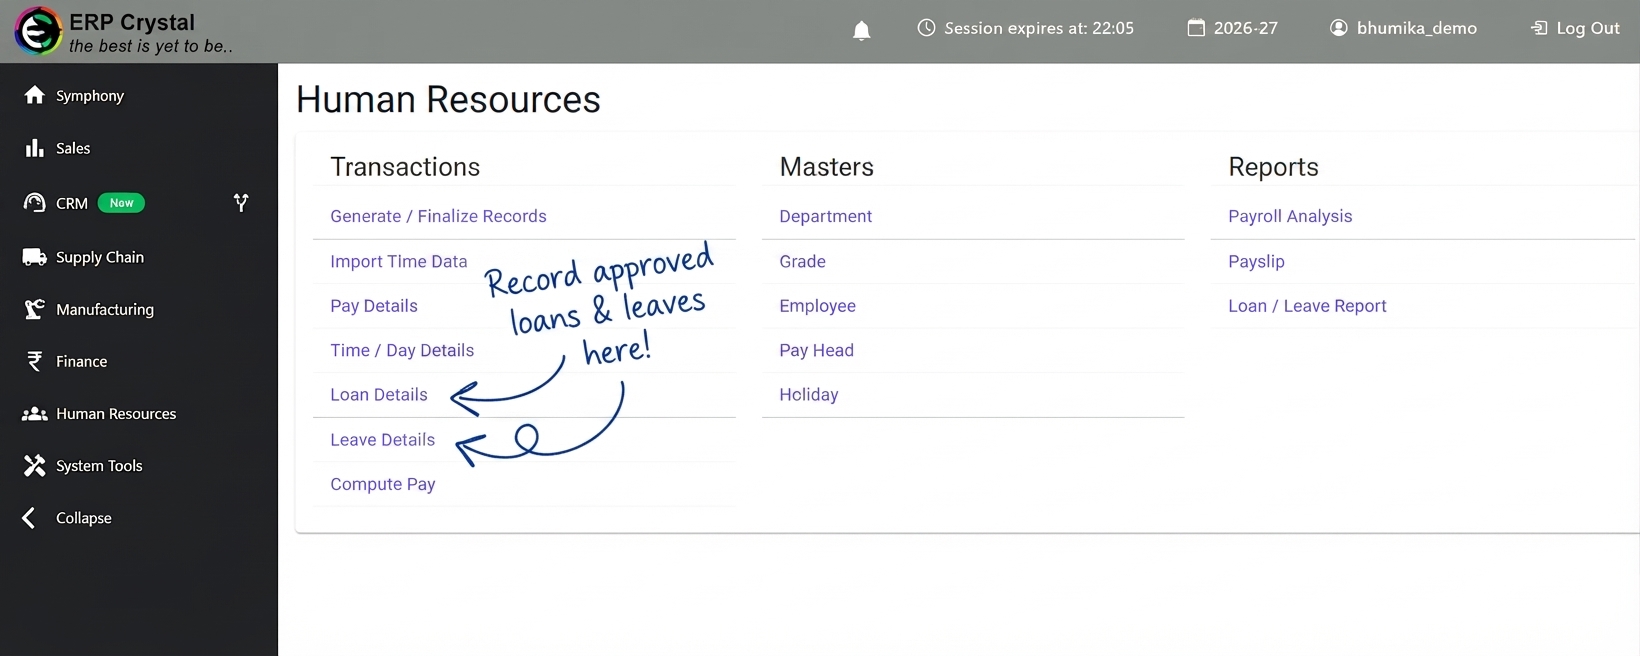
- Leave Details: Record approved leaves (Paid, Sick, Casual, or Unpaid) to update live leave balances.
- Loan Details: Record company advances/loans and set monthly installment deductions.
Step 4: Compute Pay & Finalize Month
Calculate net payable salaries and lock the month against further changes:
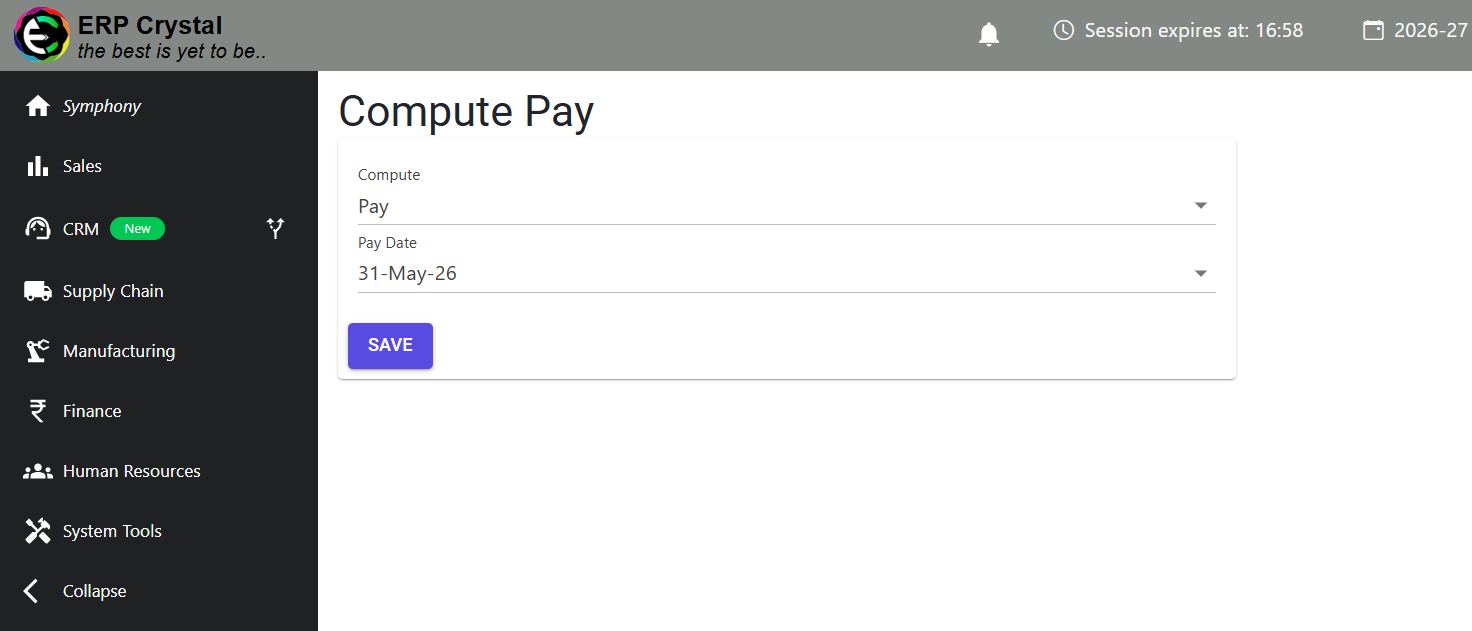
Compute Pay: Go to Compute Pay → select Pay, pick the Pay Date, and click Save.
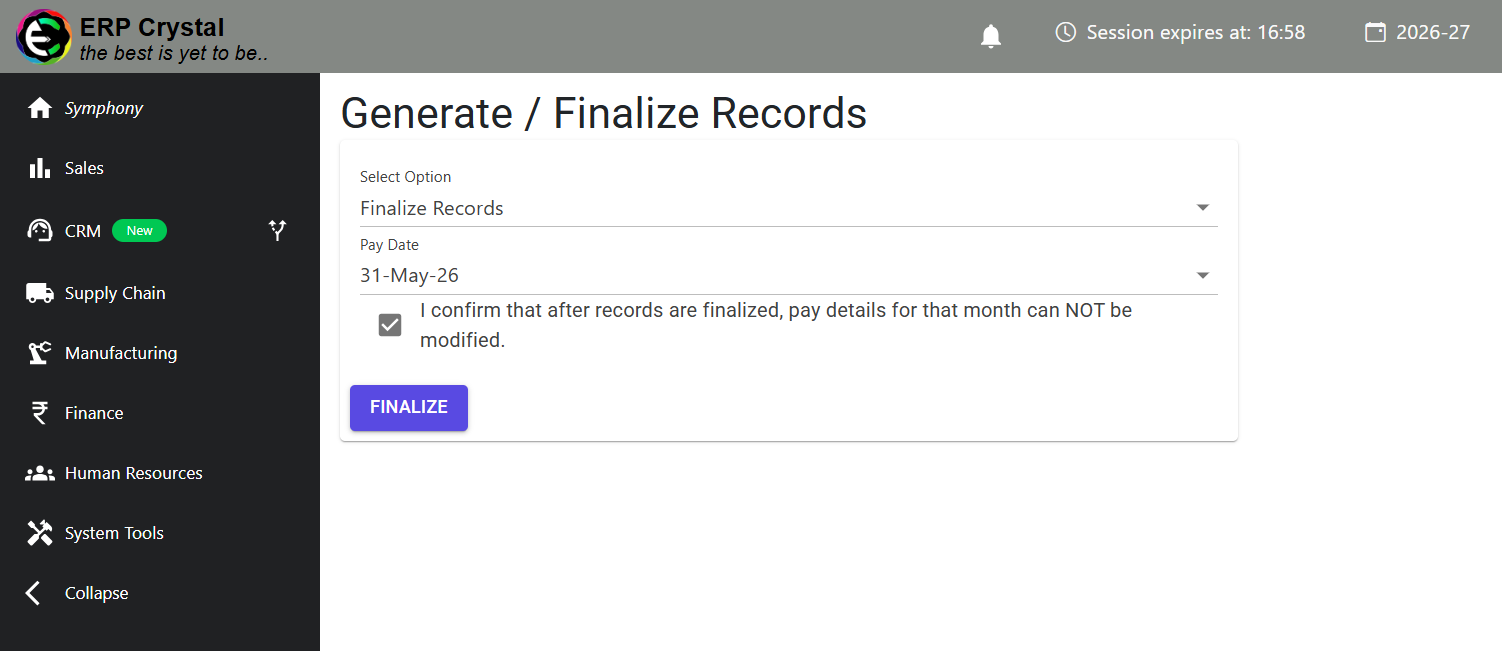
Finalize Month: Go to Generate / Finalize Records → select Finalize Records, check the lock confirmation box, and click Finalize.
📌 Phase 3: Payouts, Payslips & Reports
Generate disbursement registers, issue payslips, and review reports from the Reports section:
Post-Payroll Actions:
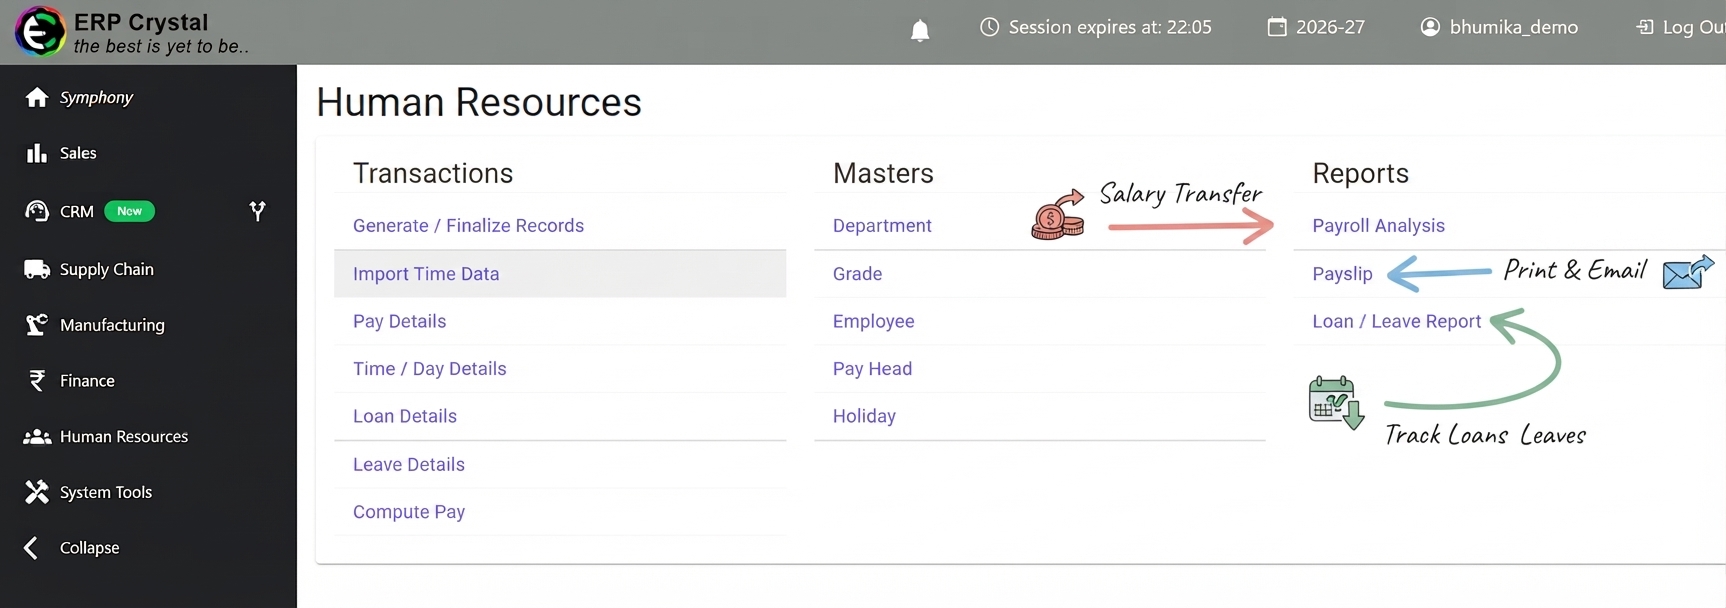
- Salary Transfer (RTGS / NEFT): Under Payroll Analysis, select Employee RTGS Register to export bank-ready payment files for bulk online transfer.
- Print & Email Payslips: Under Payslip, select the pay month to print PDF payslips or email them directly to employees in bulk.
- Track Loans & Leaves: Under Loan / Leave Report, review employee leave balances, encashments, and ongoing loan recoveries.